 |
| Bag and Tutorial Copyright 2013 Karen Wooten |
Vinyl -- 1/3 yard
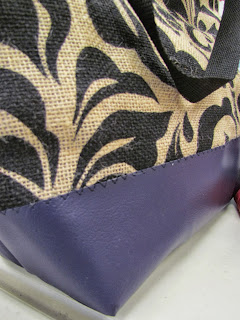
Burlap -- 1/2 yard (we sell the cute printed burlap pictured above!)
Strapping -- 1 1/3 yards
Lining -- 1/2 yard
Cutting Instructions (these cutting instructions are to make the purple bag above; these instructions can be played with to create different sizes):
Cut 1 burlap to 18" x 28"
Cut 1 vinyl to 10" x 18"
Cut 2 vinyl to 3" x 18"
Cut 2 straps to 60" lengths
Cut lining to 18" x 28" plus any pockets you would like to add inside.
Assembly Instructions:
Place the vinyl in the center of the burlap as pictured below. They should both be right sides up.
Stitch along the edge of the vinyl using a zig zag stitch. The foot will stick to the vinyl so cover it will tissue paper or wax paper to be removed after stitching.
Match the side seams right sides together; make sure the top of the vinyl matches at the side seams. Sew both side seams. Match the side seam to the center bottom and mark a straight line across the triangle however deep you want your bag to be. Sew along this line as shown below.
Sew the lining the same way and add any pockets you would like. Insert the lining into the bag, wrong sides together. Sew the two pieces of 3" x 18" vinyl together on the short ends, right sides together. This will act like binding for the top of the bag. Place this right sides together along the top edge of the bag, including lining. Sew to bag with 1/2" seam allowance going through all layers. Turn up the binding and fold to the inside of the bag. Stitch along edge of vinyl binding on the outside of the bag using a zig zag or other decorative stitch in order to catch the inside bottom edge as well.
Add your handles and any other embellishments and enjoy!
*All Fabric Center tutorials and patterns are for personal use only and are not to be made to sell!!


No comments:
Post a Comment